Introduction to Wall Photo Collages
What is a Photo Collage?
A photo collage is a creative arrangement of multiple photographs combined to create a single, visually appealing piece of artwork. It can feature a wide range of photos, such as family portraits, travel pictures, or even artwork and quotes, all curated together to tell a story. The beauty of a photo collage lies in its versatility – it can be framed or directly hung on the wall, allowing for a personalized and unique touch in any room of your home. A photo collage doesn’t just showcase pictures; it weaves together memories, emotions, and moments, making it an ideal decoration for your living space. learn more about How to Create Wall Photo Collage Step by Step Guide
Why Wall Photo Collages are Popular
Wall photo collages have become a popular home decor trend for a reason. These unique collections of photos can transform a plain wall into an eye-catching focal point. Whether it’s in your living room, bedroom, or hallway, a wall photo collage adds personality and warmth to any space. People love them because they allow for endless creativity – you can choose the layout, size, and style that reflects your personal taste. Additionally, wall photo collages provide an opportunity to display special moments, making them more than just decor but also a way to celebrate memories and experiences. It’s a fun way to showcase a piece of your life in a beautiful, artistic form.
Benefits of Having a Photo Collage in Your Home
The benefits of having a photo collage in your home are numerous. First, it adds a personal touch to your interior design, making your space feel more inviting and connected to who you are. A wall photo collage can create a warm and nostalgic atmosphere, especially when filled with photos that represent important milestones or happy moments. Moreover, a photo collage is a great conversation starter, sparking interest and discussions with guests. It also allows you to experiment with different styles – from modern and sleek to rustic and vintage – depending on your home’s aesthetic. Lastly, creating and arranging a photo collage can be a fun and therapeutic project, giving you a chance to relive cherished memories while adding beauty and style to your living space.
Choosing the Perfect Photos for Your Collage
Selecting Meaningful Photos
When creating a wall photo collage, the first step is choosing the perfect photos that are meaningful to you. These could be photos of family, friends, travel memories, or any moments that hold a special place in your heart. Think about what you want your collage to represent. Do you want it to showcase happy family moments, or perhaps memories from your travels? The key to making your photo collage stand out is to select photos that tell a story, evoke emotions, or bring back cherished memories. Avoid adding random photos that may not have personal significance. By focusing on meaningful photos, your wall photo collage will feel more authentic and connected to your life’s journey.
Mixing Different Types of Photos (Family, Travel, Art, etc.)
One of the fun parts of making a photo collage is mixing and matching different types of photos. A well-rounded photo collage doesn’t have to be all family photos or all vacation snapshots—it can feature a variety of themes that reflect your personality and interests. You might choose a few family pictures, a couple of travel photos, and even some artistic shots or abstract images. Including different photo types, such as candid moments, posed portraits, or creative artwork, can add depth and texture to your collage. This mix of photos can also help balance the overall design, giving it a unique look that tells a broader story about who you are. For example, you can blend pictures from your last vacation with a piece of art you created or a special moment from a family gathering. The possibilities are endless, allowing you to create a wall photo collage that’s as dynamic and diverse as your life.
Deciding on the Number of Photos
The number of photos you include in your photo collage plays a significant role in its overall appearance. Too many photos can make the collage feel cluttered, while too few might leave the wall looking empty. When deciding on the number of photos, consider the size of the wall and the style of the collage you’re aiming for. If you’re going for a minimalist approach, you might want to limit the number of photos to just a few that have the most impact. On the other hand, if you want a fuller look with lots of memories, you can opt for more photos, carefully arranged to avoid overcrowding. It’s important to find a balance that fits the space and reflects your style. Generally, 8-12 photos work well for a standard-sized wall, but you can adjust based on the wall’s dimensions. Remember, the goal is to create a cohesive, visually appealing photo collage that feels just right for your space.
Planning Your Wall Collage Design
Choosing the Right Layout (Grid, Freeform, etc.)
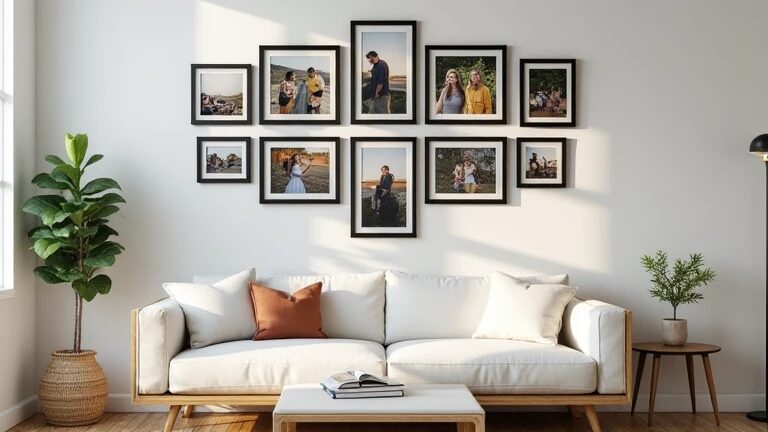
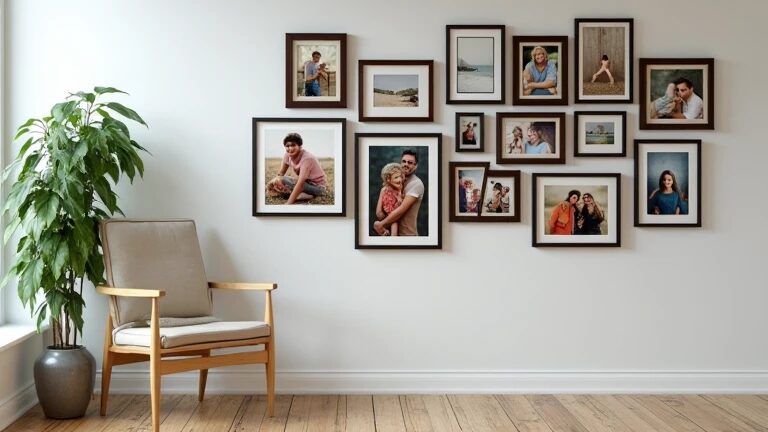
When planning your wall photo collage, one of the first things to consider is the layout. The way you arrange your photos can significantly impact the overall look and feel of the collage. There are various layout styles to choose from, such as a grid layout or a freeform layout. A grid layout arranges the photos in neat, uniform rows and columns, giving a clean and orderly look. This style works well if you want your photo collage to have a more structured, modern aesthetic. On the other hand, a freeform layout is more relaxed, where the photos are placed randomly, creating a dynamic and organic feel. This style allows for more creativity and flexibility, letting your wall photo collage reflect your personality and style. Whether you go with a grid or freeform, make sure the layout complements the overall design of your room and enhances the visual appeal of your photo collage.
Determining the Size of Your Collage
The size of your wall photo collage is another crucial factor in the design process. A large collage can become the focal point of the room, while a smaller collage might blend seamlessly with the existing decor. To determine the size, start by measuring the wall space where you plan to hang the collage. It’s essential to choose a size that fits well within the proportions of the wall and complements the room’s layout. If you have a large wall, you might want to opt for a bigger photo collage, using a combination of photos that fill the space without overwhelming it. For smaller walls, you can go with a more compact collage, possibly focusing on just a few photos arranged creatively. Keep in mind that the size of the collage should also reflect the mood or style you want to create. A large photo collage can make a bold statement, while a smaller one can feel more intimate and cozy.
Considering Wall Space and Room Aesthetics
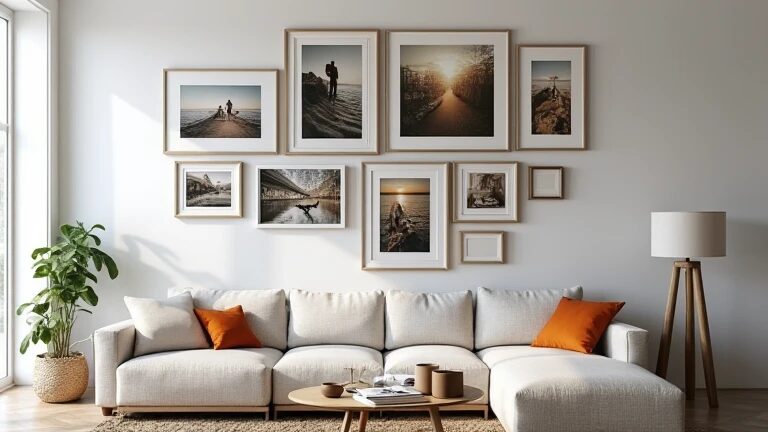
When planning your wall photo collage, it’s important to consider the wall space and the overall room aesthetics. The size, color, and style of your photo collage should complement the room’s existing decor. For example, if the room has neutral-colored walls, you might choose to go with vibrant, colorful photos to add contrast and visual interest. Alternatively, if the room is already filled with bright colors, you may opt for more muted or monochromatic photos to maintain a balanced and harmonious look. The placement of your photo collage is also crucial—consider where it will be most visible and how it interacts with other elements in the room. If the wall is near furniture, make sure the collage doesn’t feel crowded or too close to other decor pieces. Also, think about the room’s vibe—if it’s a relaxed space like a bedroom, you might want to keep the photo collage simple and calming. In a more lively space, such as a living room or dining area, you can go for something more dynamic and playful. By thoughtfully considering your wall space and room aesthetics, you can create a photo collage that enhances the overall look and feel of the room.
Materials You’ll Need for a Photo Collage
Frames vs. Direct Wall Hanging
When creating a photo collage, one of the first decisions you’ll need to make is whether to use frames or go for direct wall hanging. Both options have their benefits and can dramatically affect the look of your wall photo collage. Frames offer a more polished, traditional look. They come in various styles, colors, and materials, allowing you to choose frames that match your home decor. Using frames can give your photos a more structured appearance, making them stand out as individual pieces of art. On the other hand, direct wall hanging offers a more modern, casual feel. It’s perfect if you prefer a more organic, freeform style where the photos are placed directly on the wall without any boundaries. This method can be quicker and more flexible, allowing you to easily update your collage over time. Whichever option you choose, make sure it suits the style and atmosphere you want to create with your photo collage.
Adhesives and Hanging Tools
To securely attach your photos to the wall, you’ll need the right adhesives and hanging tools. If you’re not using frames, consider using adhesive strips or double-sided tape, which are perfect for direct wall hanging. These adhesive options are damage-free, easy to use, and won’t leave marks on your wall. They are ideal for renters or anyone who wants to avoid making holes in the wall. For a more permanent solution, you can use picture hooks or nails, especially if you’re working with frames. These tools provide a more secure hold, ensuring your photos stay in place for a long time. You can also use a level tool to ensure that your photos are hung straight and aligned, which is essential for creating a clean and organized wall photo collage. No matter which method you choose, make sure your hanging tools are appropriate for the weight and size of your photos to avoid accidents.
Choosing the Right Frames or Mounting Options
Choosing the right frames or mounting options is a crucial part of your photo collage design. Frames can add character and style to your wall photo collage, but it’s important to select ones that match the overall look of your room. For example, if you have a modern decor, sleek, minimalist frames in neutral colors such as black or white will blend well with the space. For a more vintage or rustic look, wooden frames or distressed finishes can create a warm, nostalgic feel. If you prefer a more creative and customizable approach, you might choose floating frames that allow the photos to appear as though they’re suspended in air. Alternatively, mounting options like foam boards or canvases can give your collage a more contemporary look, where the photos are mounted directly onto the surface, often without the need for frames. When choosing your mounting options, consider how much space you have on your wall, the overall theme of the room, and the vibe you want your photo collage to have.
Step-by-Step Guide to Making Your Wall Photo Collage
Step 1: Preparing Your Photos
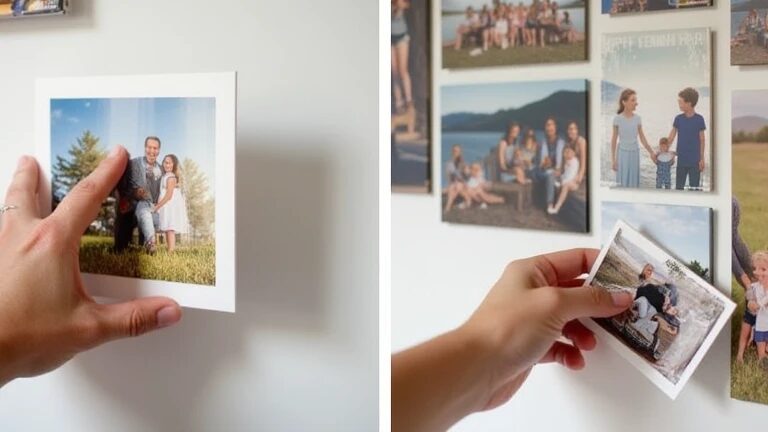
The first step in creating your wall photo collage is to prepare your photos. Start by selecting and printing the photos you want to use. It’s important to choose high-quality images that are clear and sharp. You can print your photos at home or through a professional printing service, depending on the size and quality you need. Once your photos are printed, cut or trim them as needed to fit your desired layout. If you’re using frames, make sure the photos fit the frame size. If you’re planning to hang the photos directly on the wall, ensure that they’re the right size for the space you’ve planned out. Also, consider the finish – glossy or matte – depending on the effect you want. Preparing your photos ahead of time will make the next steps much easier and ensure your wall photo collage turns out just as you imagine.
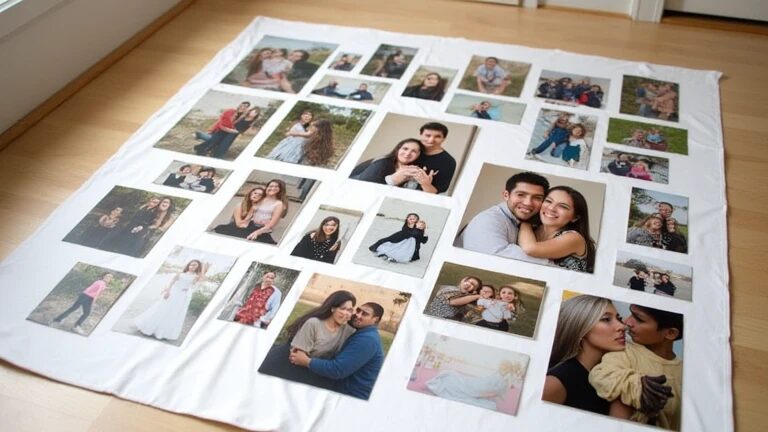
Step 2: Arranging the Photos on the Floor
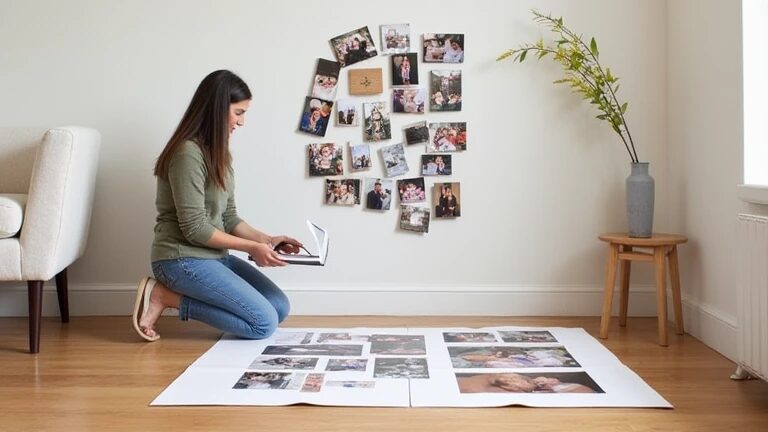
Before you start hanging your photos on the wall, it’s a good idea to lay them out on the floor to get a sense of how they’ll look together. This step allows you to experiment with different arrangements and layouts, ensuring everything is balanced and aligned. You can arrange your photos in a grid layout for a more structured look or a freeform layout for a more casual and creative feel. Try different combinations of photos and move them around until you’re happy with how they look. This step will help you visualize your wall photo collage and avoid making mistakes when it’s time to hang the photos. Once you’re satisfied with the layout, take a picture of the arrangement on the floor so you can refer back to it while hanging the photos on the wall.
Step 3: Marking the Layout on the Wall
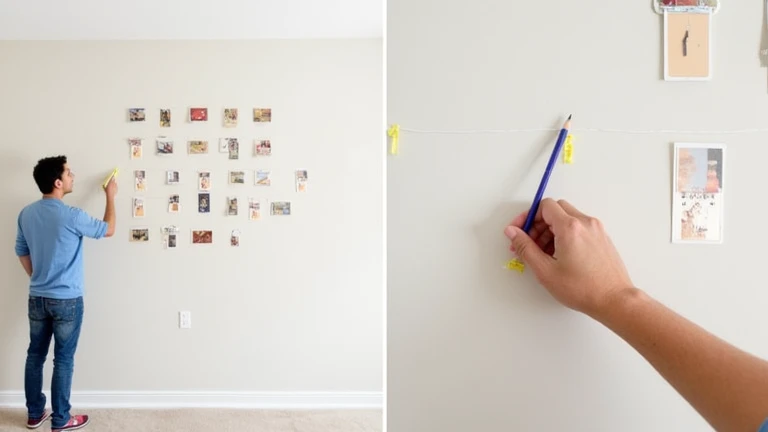
Now that you have your layout arranged on the floor, it’s time to transfer it to the wall. Start by measuring the space where you want to hang your photo collage. Use a pencil to lightly mark the spots where each photo will go, ensuring they are evenly spaced. If you’re using a grid layout, make sure to measure the gaps between the photos to keep them consistent. If you’re going for a freeform layout, place the marks where each photo will hang, but allow for some flexibility in spacing. A level tool can help make sure your marks are straight, giving the photo collage a neat and balanced appearance. This step will guide you as you hang the photos and ensure they’re placed exactly where you want them.
Step 4: Hanging Your Photos Securely
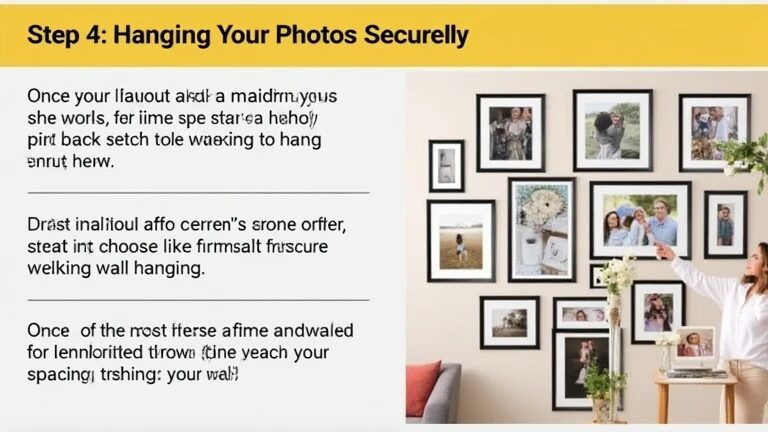
Once your layout is marked on the wall, it’s time to hang your photos. Depending on the method you’re using (frames or direct hanging), you’ll need to choose the right tools to secure your photos. If you’re using frames, use picture hooks or nails that can hold the weight of the frame. If you’re using adhesive strips for direct wall hanging, make sure they’re strong enough to hold the photos without damaging the wall. Start with the photo in the center or the one you want to place first, and work your way outwards. Take your time to make sure each photo is securely attached and level. If you’re using a grid layout, check the spacing as you go to ensure everything is aligned. Step back occasionally to get an overall view and make sure the photo collage looks balanced. Once all the photos are hung, step back and admire your work – your wall photo collage is now complete!
Tips and Tricks for a Perfect Photo Collage
Using Different Frame Styles for Visual Interest
One of the easiest ways to enhance your wall photo collage is by using different frame styles. Mixing up frame types can add visual interest and depth to your collage. For example, you could combine sleek, modern frames with vintage or rustic ones to create an eclectic look. If you want a more cohesive feel, choose frames in the same color but with varying shapes and sizes. This contrast helps draw attention to each photo, making your photo collage stand out as a dynamic piece of art. Don’t be afraid to experiment with different frame materials, such as wood, metal, or acrylic, to create texture and visual appeal. Using different frame styles adds personality and makes your wall photo collage more visually engaging, allowing each photo to shine in its own unique way.
Incorporating Art and Decorations into the Collage
To make your wall photo collage even more eye-catching, consider incorporating art and decorations alongside your photos. This could include hanging small artwork, decorative pieces, or even inspirational quotes that complement the theme of your collage. For example, if your photos feature family memories, you might add a framed quote about family or love. If you have travel photos, a small world map or travel-related artwork can add to the theme. By adding these personal touches, you create a more cohesive, meaningful display that ties your photo collage together. When selecting art and decorations, make sure they don’t overwhelm the photos; instead, let them enhance the overall aesthetic. Incorporating these elements gives your wall photo collage a more curated, artistic feel.
Tips for Maintaining Symmetry and Balance
Maintaining symmetry and balance is key to creating a wall photo collage that looks well-organized and visually pleasing. Whether you choose a grid layout or a more freeform style, make sure there’s a sense of balance across the collage. For example, if you place a larger photo on one side, balance it out with a couple of smaller photos on the opposite side. In a grid layout, symmetry is easier to achieve, but in a freeform layout, you’ll need to pay attention to the spacing between photos to make sure they’re evenly distributed. You can also maintain balance by mixing different sizes of photos – just ensure that the larger photos don’t overpower the smaller ones. Using a level tool while hanging photos helps keep everything straight and aligned. Stepping back and evaluating your photo collage from a distance is also a great way to check for balance and symmetry, ensuring the display is pleasing to the eye.

Customizing Your Wall Collage for Different Rooms
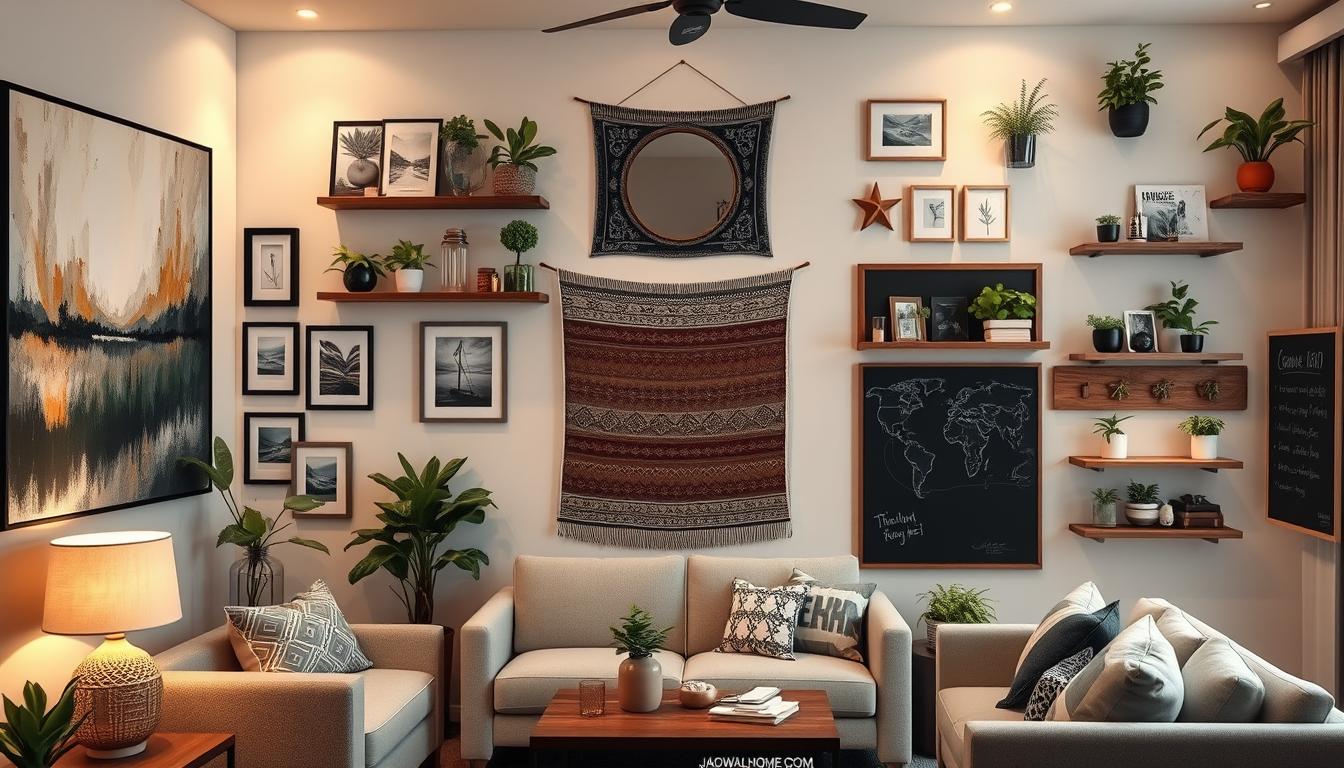
Living Room Collages
The living room is often the heart of the home, making it the perfect space for a photo collage that captures family memories, travel adventures, or favorite moments. For living room collages, it’s important to choose photos that reflect the tone and style of your living space. If you have a modern living room, consider using sleek frames or a grid layout to create a clean, organized look. If your living room has a more cozy, rustic feel, you could mix different frame styles like distressed wood with black metal frames for a warm, eclectic vibe. You can also use a mix of family portraits, candid shots, and art that ties into the color scheme of the room, whether it’s neutral, vibrant, or earthy. A living room photo collage should feel inviting, so arrange your photos in a way that encourages conversation and evokes positive emotions.
Bedroom Collages
A bedroom photo collage should feel intimate and personal, reflecting your style and the mood you want to create in your private retreat. For the bedroom, soft and serene tones work well, especially if you want a calming atmosphere. You could choose photos of nature, love, or moments that bring you peace. In a bedroom collage, consider incorporating soft lighting, such as string lights around your photos, to add a cozy touch. You can experiment with the layout too—perhaps a grid layout above your bed or a more freeform arrangement along one wall. Frame styles in the bedroom should complement the overall aesthetic, whether you’re going for minimalistic, vintage, or a more bohemian style. Don’t forget to keep the layout symmetrical to create a soothing, harmonious effect in your space.
Kitchen or Hallway Collages
When it comes to kitchen or hallway collages, these spaces are often smaller and can benefit from a more playful or functional approach. In the kitchen, you might choose a photo collage of food, drinks, or family gatherings to make the space feel more inviting. Bright, colorful frames or playful designs can work well to add a fun, lively touch to your kitchen walls. For a hallway collage, use a more consistent and streamlined layout to ensure the collage doesn’t overwhelm the narrow space. You can create a vertical arrangement of smaller photos or even add a row of frames at eye level to keep the space feeling open and organized. Hallway collages work well with travel photos or black-and-white art, giving the corridor a stylish, gallery-like feel. Whether it’s the kitchen or hallway, customizing your photo collage to suit the room’s size and purpose ensures the display feels thoughtfully designed and adds personality to your home.
Conclusion: Creating a Wall Photo Collage That Reflects Your Personality
In conclusion, designing a wall photo collage is not just about arranging photos on a wall; it’s about telling a story, reflecting memories, and creating a personalized space that speaks to who you are. From the initial process of selecting meaningful photos to choosing the right frames and arranging them thoughtfully, every step plays a crucial role in ensuring your photo collage is visually appealing and emotionally significant.
A wall photo collage is a perfect way to bring warmth and personality to any room. Whether you’re decorating your living room, bedroom, or even a kitchen or hallway, you can customize the design to complement the existing decor of the space. By carefully planning your layout, choosing the right materials, and incorporating unique elements like art or decorations, your collage becomes more than just a collection of photos—it transforms into a unique work of art that enhances your home’s ambiance.
As you plan your photo collage, don’t forget to keep symmetry and balance in mind, ensuring your arrangement feels both organized and visually appealing. The flexibility of a photo collage allows for creative expression, making it an ideal project for anyone who wants to bring a personal touch to their walls. Whether you prefer a grid layout for a clean, structured look or a freeform style for a more casual approach, the possibilities are endless.
Ultimately, a wall photo collage is a reflection of your memories, passions, and experiences, offering an opportunity to share your story with those who visit your home. It’s a fun, rewarding way to decorate while preserving the moments that matter most. So, gather your favorite photos, choose the right frames, and get started on creating a beautiful, personalized wall photo collage that will be a conversation starter for years to come.
FAQs About Creating a Wall Photo Collage
What is a photo collage, and how is it different from a regular photo display?
A photo collage is a creative arrangement of multiple photos on a wall or surface, designed to form a unified visual display. Unlike regular photo displays, which may consist of just a few framed images, a photo collage allows you to combine a variety of photos, often in a themed or artistic layout, to tell a story or evoke a particular mood. The main difference lies in the collective presentation—the idea is to showcase a collection of memories, moments, or artistic expression, rather than individual framed pictures scattered around a room.
How do I choose the right photos for my collage?
When selecting photos for your wall photo collage, think about the theme or mood you want to convey. Meaningful photos, such as family portraits, travel snapshots, or images that capture significant life moments, work well for adding personal touches. Consider mixing different types of photos—like candid moments, artistic photos, or black-and-white images—to create variety and visual interest. It’s also important to choose photos with good resolution to ensure they look sharp and clear when displayed in larger frames. Finally, balance the types of images so the collage tells a cohesive story, without overwhelming one style over another.
How do I decide on the best layout for my photo collage?
Choosing the right layout for your wall photo collage depends on the available space and the aesthetic you want to achieve. A grid layout offers symmetry and structure, with each photo placed in neat rows and columns. This works well in modern or minimalist spaces. Alternatively, a freeform layout gives a more relaxed, dynamic feel, with photos arranged organically. When deciding, also think about the size of the wall—larger walls can accommodate more varied layouts, while smaller spaces may benefit from a more structured grid arrangement. Always step back to view your collage from a distance to ensure balance and harmony.
What materials do I need to create a photo collage?
To create a wall photo collage, you’ll need some basic materials: photos, frames (if desired), adhesives, and hanging tools. Frames can be varied in size, material, and style, depending on the look you’re going for. If you’re hanging the photos directly on the wall without frames, adhesive hooks, wall-safe tape, or poster strips can work well. You might also need a level tool to ensure that everything is aligned properly. Additionally, a measuring tape can help space the photos evenly. The choice of materials ultimately depends on whether you want a framed, polished look or a more casual, free-spirited arrangement.
How do I maintain balance and symmetry in my photo collage?
Maintaining balance and symmetry in your photo collage is crucial to ensure the display looks harmonious. If you’re using a grid layout, symmetry comes naturally, with all photos organized in rows and columns. However, for a freeform layout, balance can be achieved by varying the sizes of the photos and ensuring they are evenly distributed across the wall. Place larger photos in the center or at strategic points and surround them with smaller images to avoid overcrowding. Step back regularly to check how the collage looks from a distance, making sure that no section feels too heavy or sparse.
Can I create a photo collage without using frames?
Yes, you can absolutely create a wall photo collage without frames. Many people opt for a more casual and modern approach by directly mounting photos on the wall. There are many ways to do this—using photo corners, adhesive strips, or poster putty that won’t damage the wall. This method can create a more relaxed, informal look. For an added touch, you can even print your photos on canvas or photo paper for a sleek finish. Keep in mind that a frame-free collage requires careful attention to alignment and spacing to achieve a polished, cohesive look.
How can I make my photo collage look more artistic?
To add an artistic flair to your wall photo collage, consider mixing different photo styles such as black-and-white with color, or candid shots with posed portraits. Incorporating decorative elements like small artwork, inspirational quotes, or illustrations related to your theme can help personalize the space. Adding texture with different frame styles or unique hanging methods, like using string lights or clipboards, can give the collage a contemporary, creative touch. Using a mix of sizes and shapes of photos, along with varying orientations (vertical and horizontal), will also keep things visually interesting.
What are the best tools for hanging a photo collage on the wall?
When hanging a photo collage, the best tools will depend on whether you’re using frames or not. For framed photos, picture hangers or nails are often the go-to, but for lighter frames, adhesive hooks and poster strips are excellent options. If you’re hanging photos without frames, velcro strips or command strips are highly effective and wall-safe. It’s always a good idea to use a level to ensure your photos are straight and evenly spaced. A measuring tape can also help space your photos evenly across the wall. These tools help ensure a secure, organized display.
How do I keep my photos in a collage from getting damaged over time?
To preserve your photo collage for the long term, consider using high-quality materials that protect your photos. Frames with UV-resistant glass can help prevent fading due to exposure to light. If you’re hanging photos without frames, using photo corners or protective sheets can safeguard against bending, tearing, or fading. For frames, choose ones that offer protection against dust and moisture. Keep the wall in a stable, dry area to avoid damage from humidity or excessive sunlight. Regularly check your collage for any wear and tear, and replace or rearrange photos as needed to maintain the collage’s visual appeal.
How can I create a photo collage on a budget?
Creating a photo collage on a budget is easy and can still look stunning. Start by printing your own photos at home or using an affordable printing service. Instead of buying expensive frames, consider purchasing cheap frames in bulk or using thrifted frames for a unique, eclectic look. Alternatively, you can opt for mounting photos directly on the wall using adhesive photo corners or poster strips. Get creative with your materials and consider making DIY frames using items like washi tape, twine, or even cardboard. By thinking outside the box, you can create a personalized and meaningful photo collage without spending a fortune.
